
V1 SCRIPT WORKFLOW: These steps describe the earlier TradeSmart V1 alert format and third-party connection process, not Premium V2 automation. Provider screens and requirements may have changed. Check the current provider instructions and paper-test entry, exit, position size and emergency close before any live use. For a V2 script, use the V2 automation guides.
WunderTrading (previously WunderBit)
Step 1
First, you need to register for WunderTrading, you can use the free plan with 2 bots running.
For this tutorial, I created a new account and you will also get a 7-day free trial for the Pro plan.
Step 2
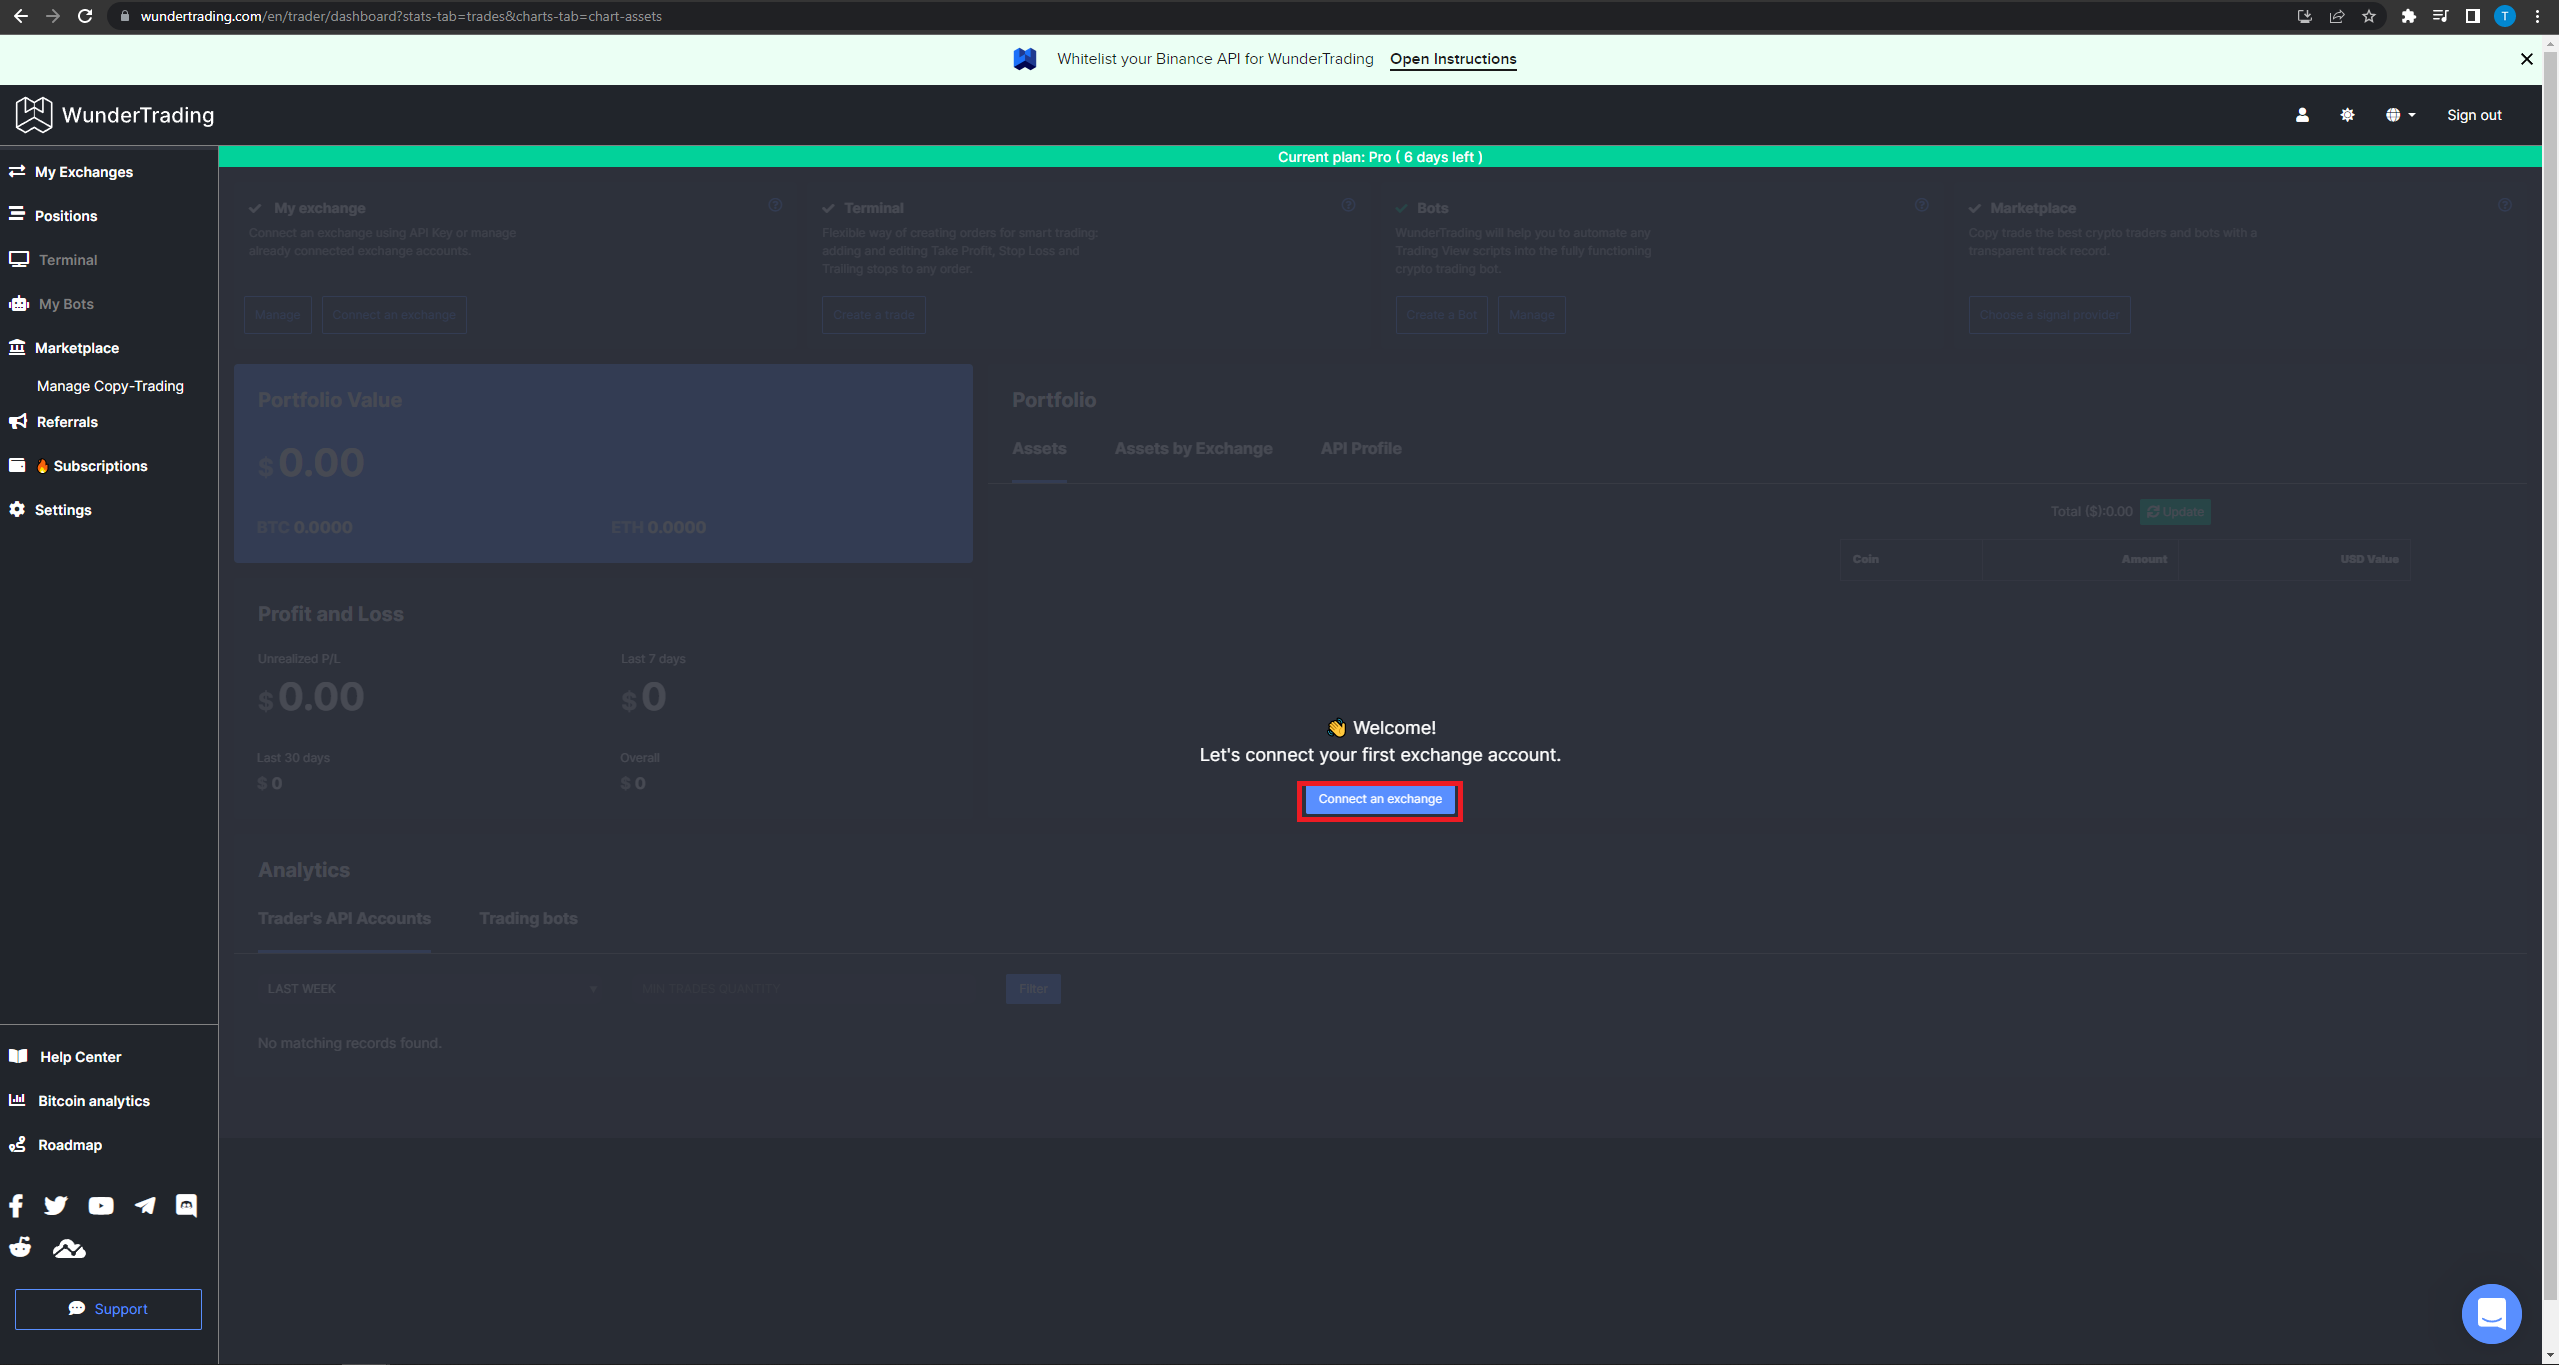
When you log in for the first time, you should see the following screen and click on the “Connect Exchange” button.
Step 3
Open Binance on a new page and log in, for this tutorial we are going to use Binance, but you can check the supported exchanges here.
Step 4
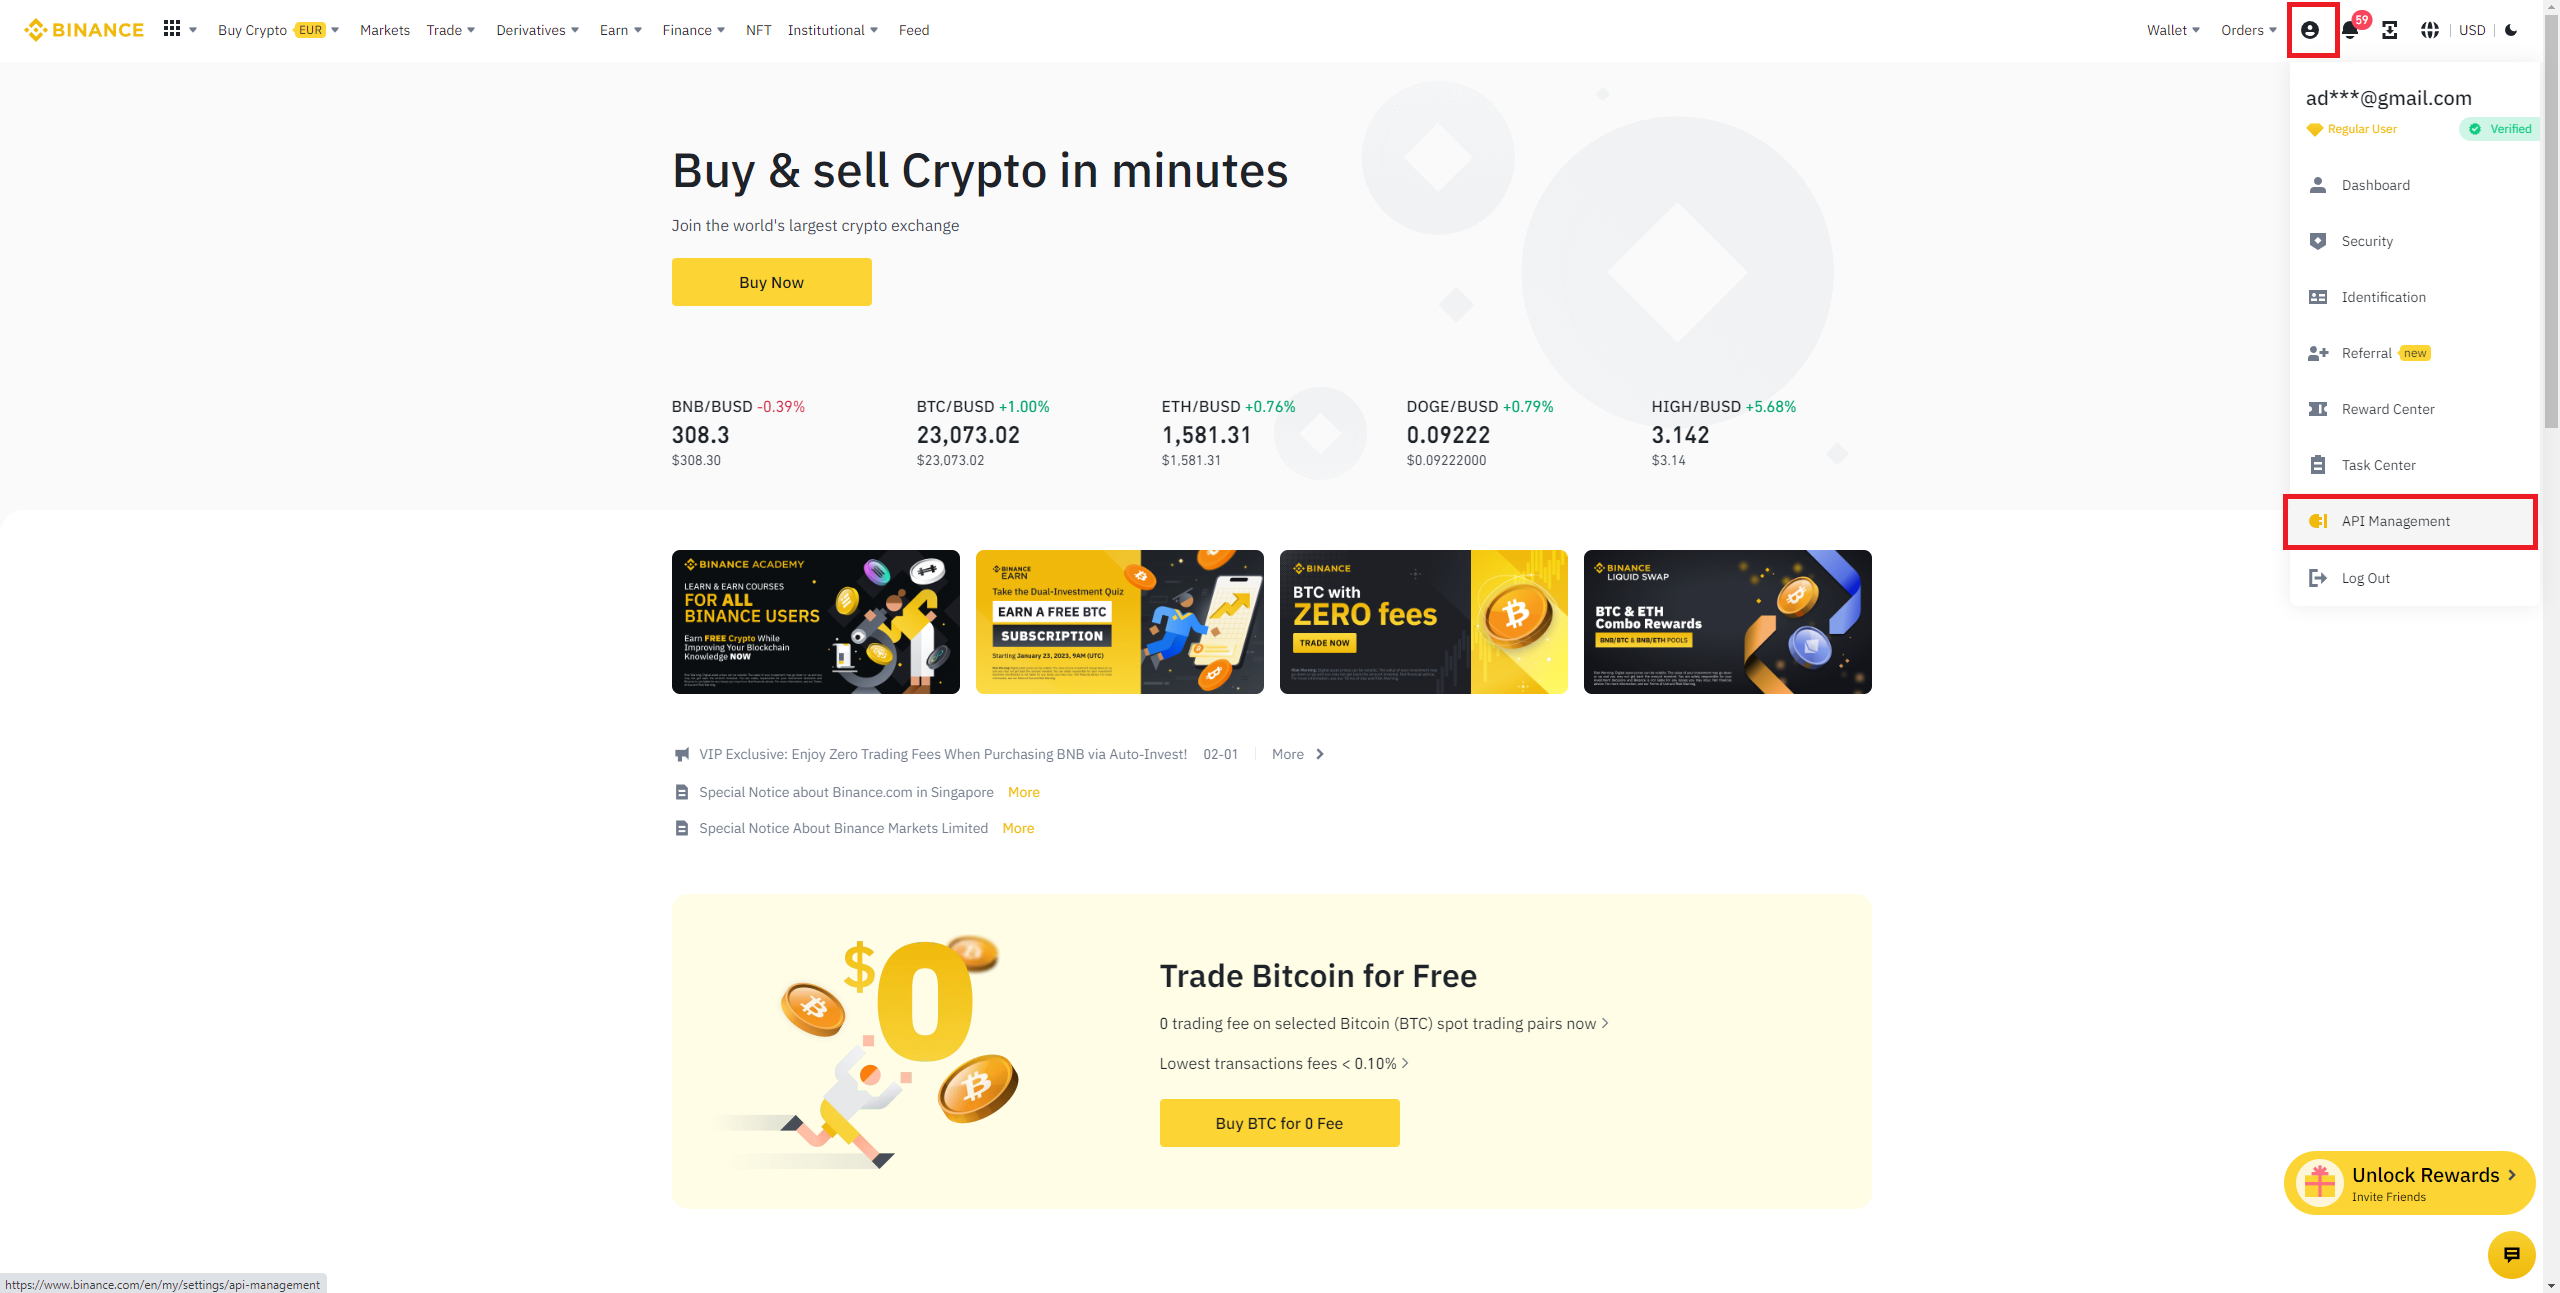
Next, click on the profile picture in the top right corner of the page and choose the “API Management” option.
Step 5
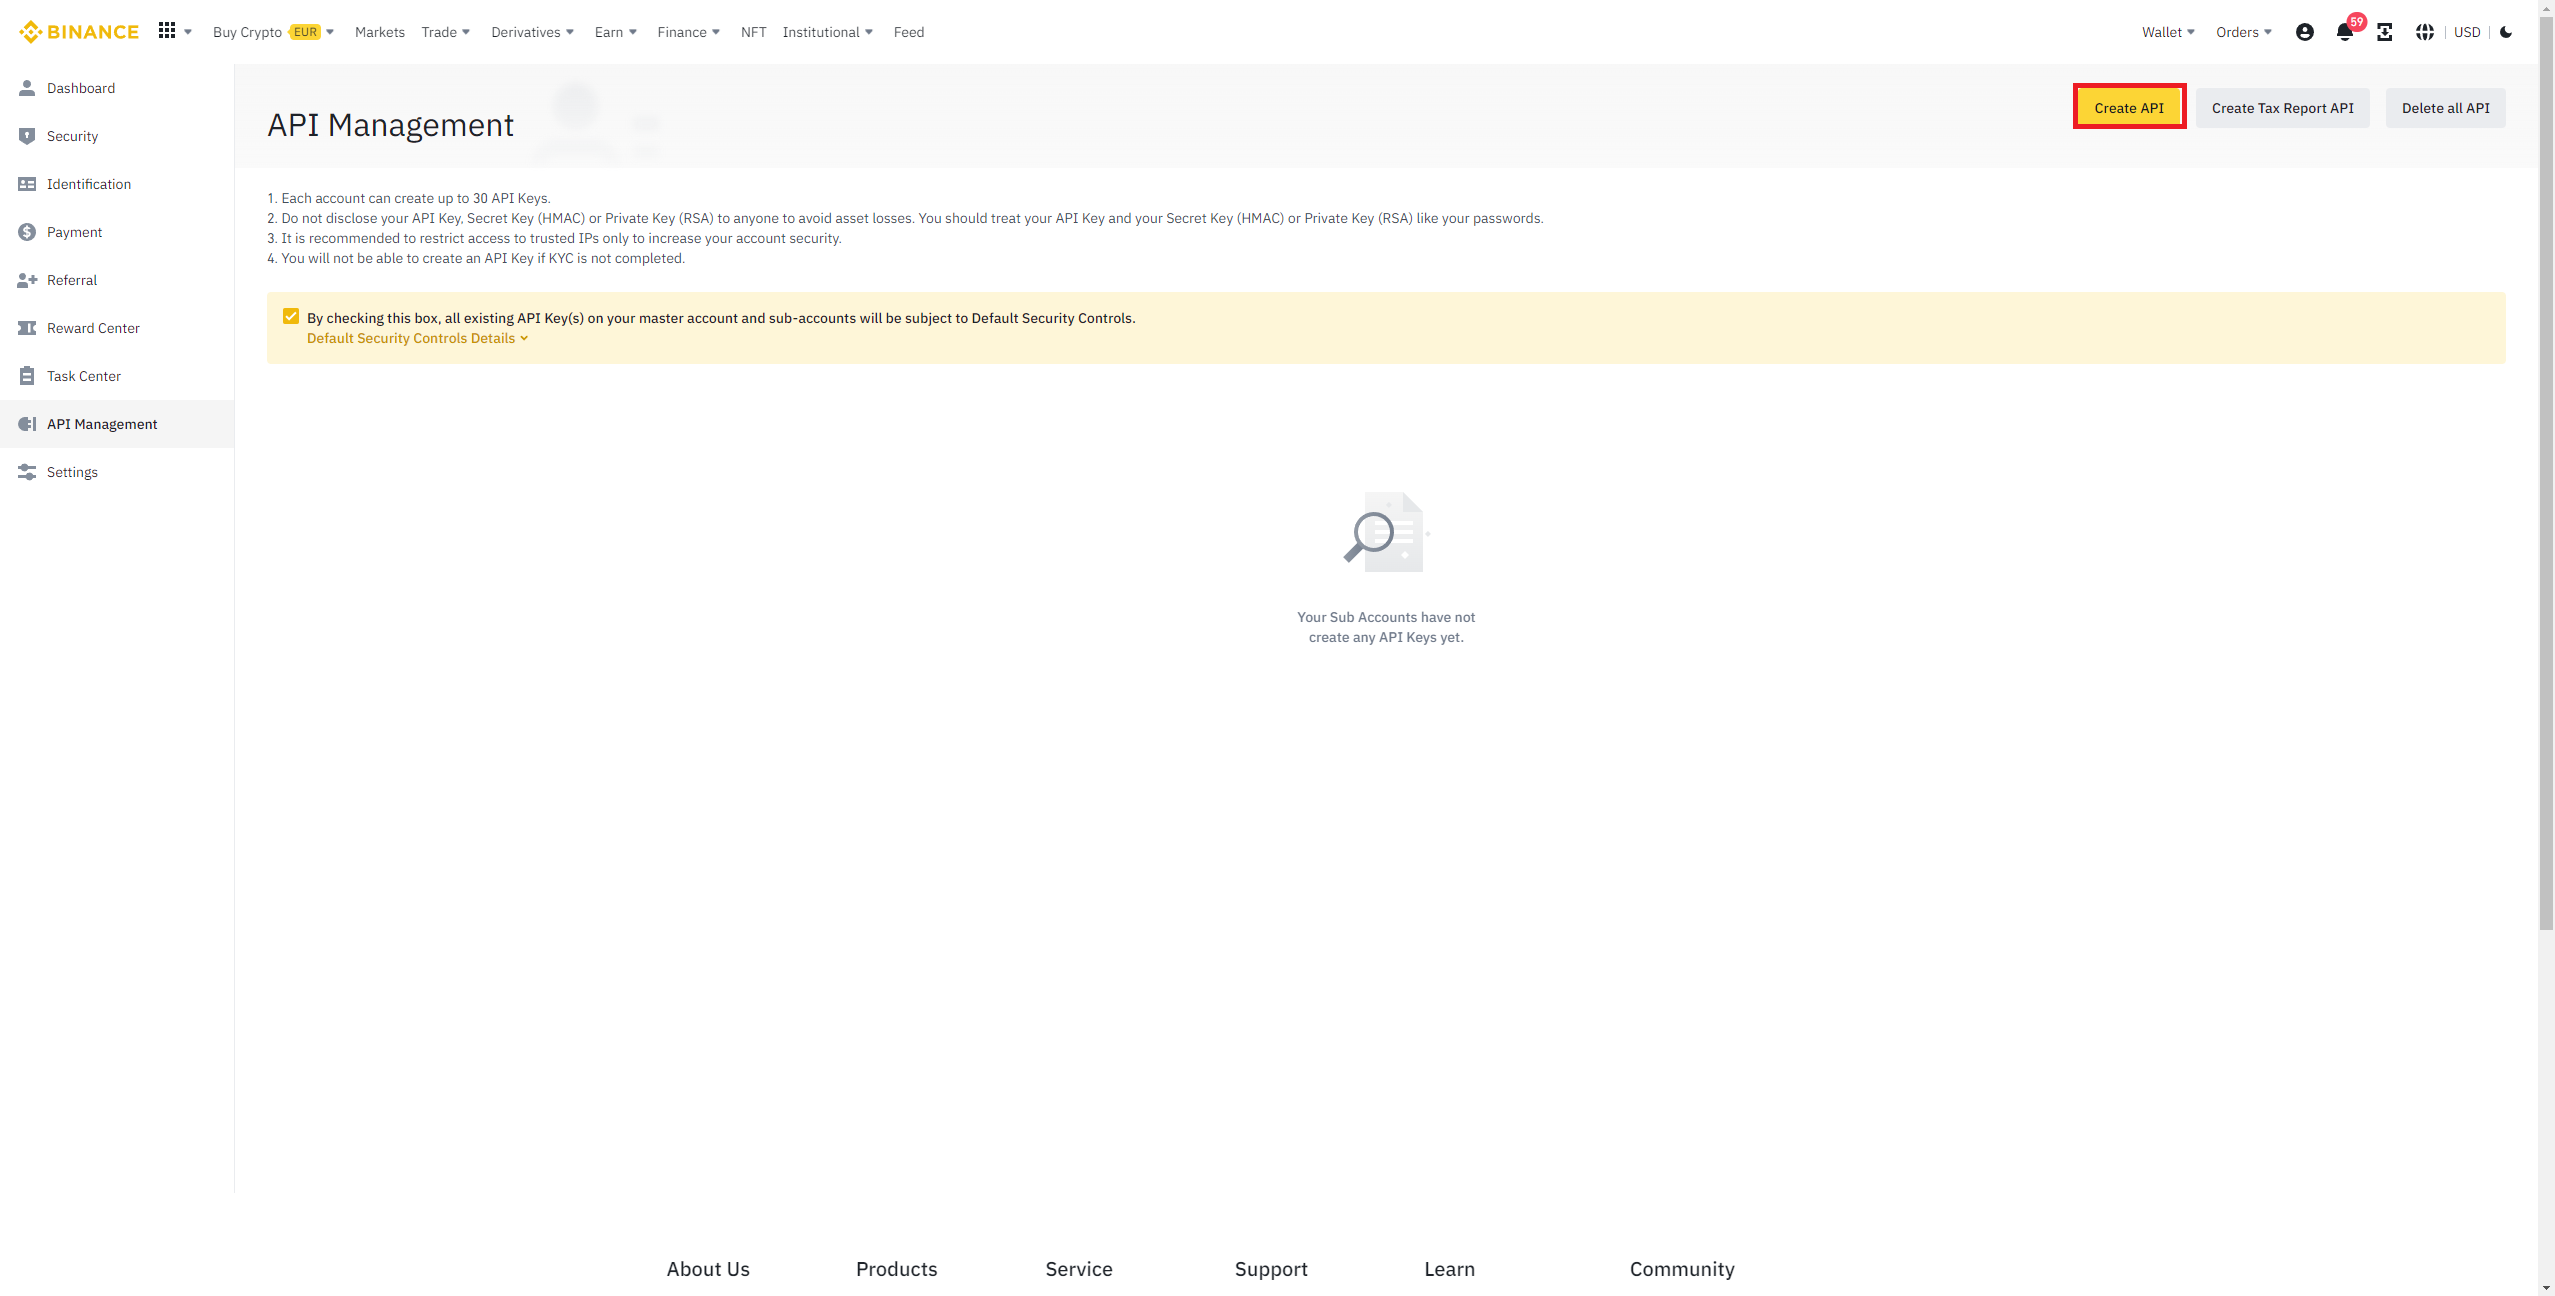
Click “Create API” and choose the “System Generated Key Type.” Then add a name to the API.
Step 6
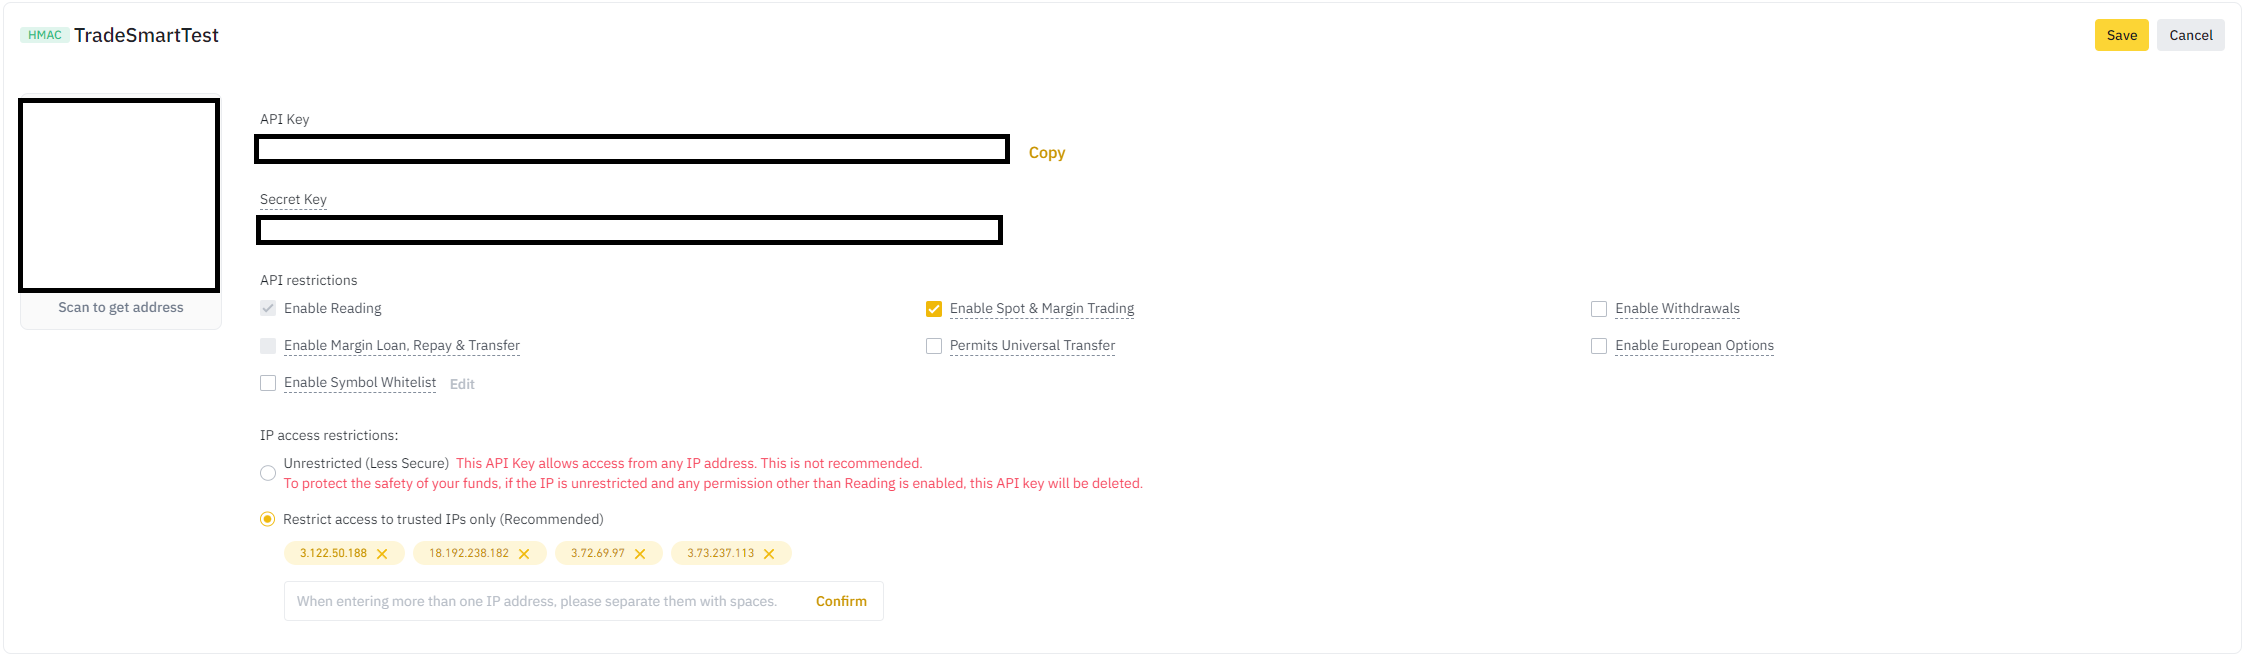
Click “Edit Restrictions” in the top right corner.
Tip
Please be aware that you have to use “Restrict Access to Trusted IPs Only” so that you can enable Spot & Margin Trading. Add the following IP addresses:
3.122.50.188
18.192.238.182
3.72.69.97
3.73.237.113
These are the IP addresses that Wunderbit uses for spot trading. You can check the others here.
After that, click the “Save” button.
Step 7
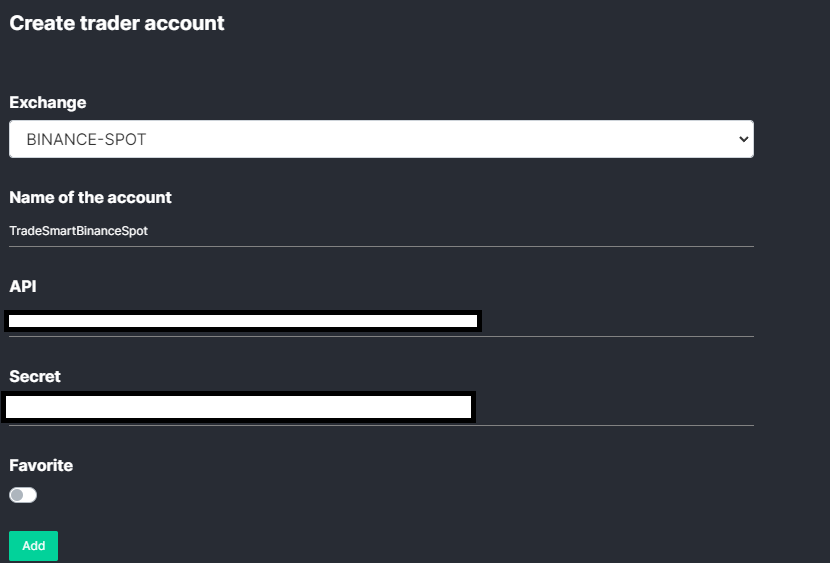
Now you can go back to WunderTrading, choose your exchange API key and API secret, and then click “Add.”
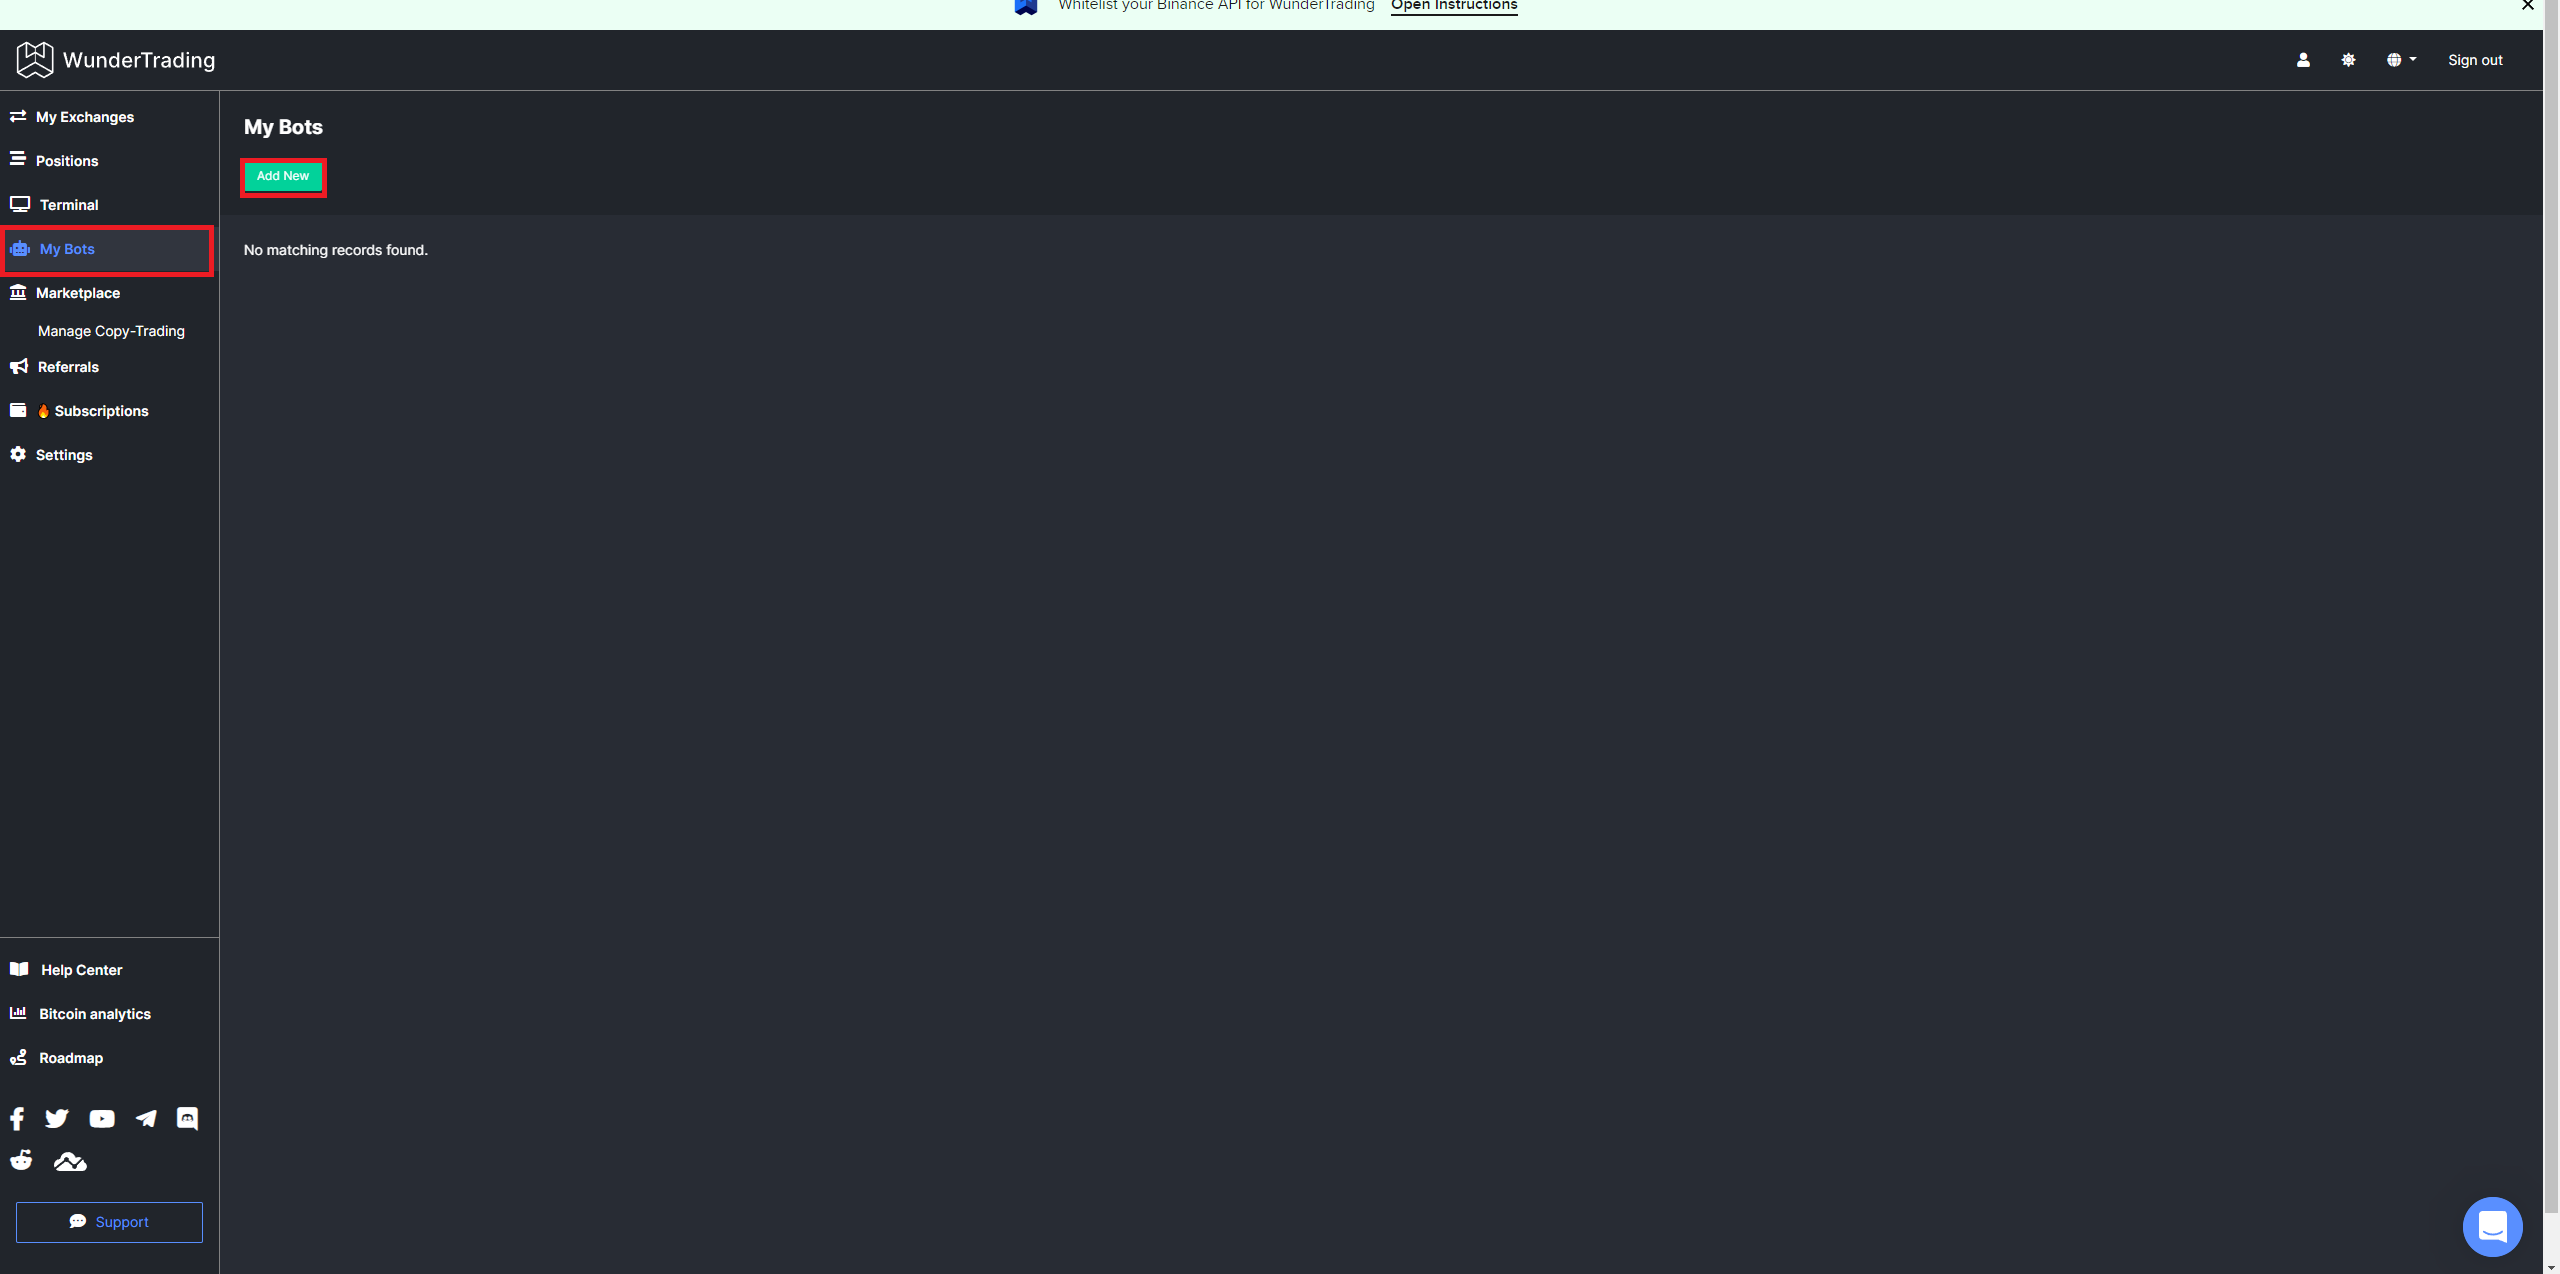
After that, click on “My Bots” and then “Add New.”
Tip
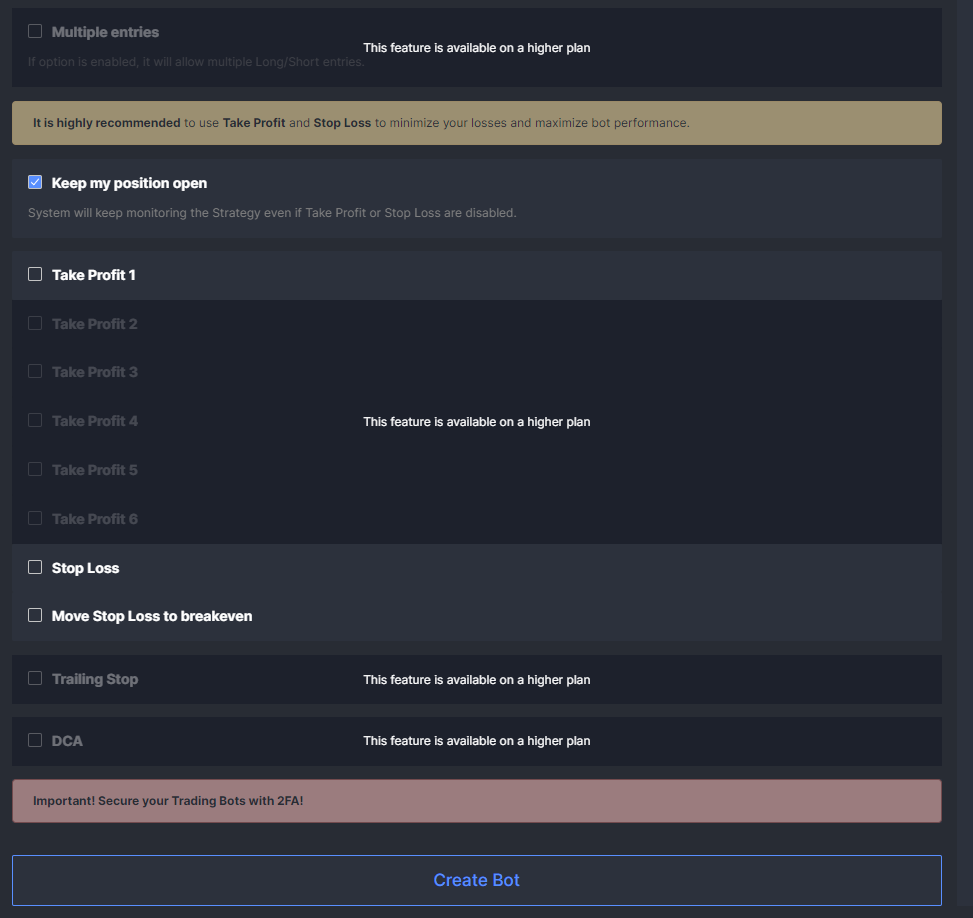
You can copy the settings from below. Please be aware that these are not the recommended settings, as they should be adjusted to your preferred strategy.

Step 8
Open Tradingview in a new tab, set the trading pair and timeframe, and add one of our PREMIUM scripts to the chart. Open the script settings, then scroll down to the “Automation” part.
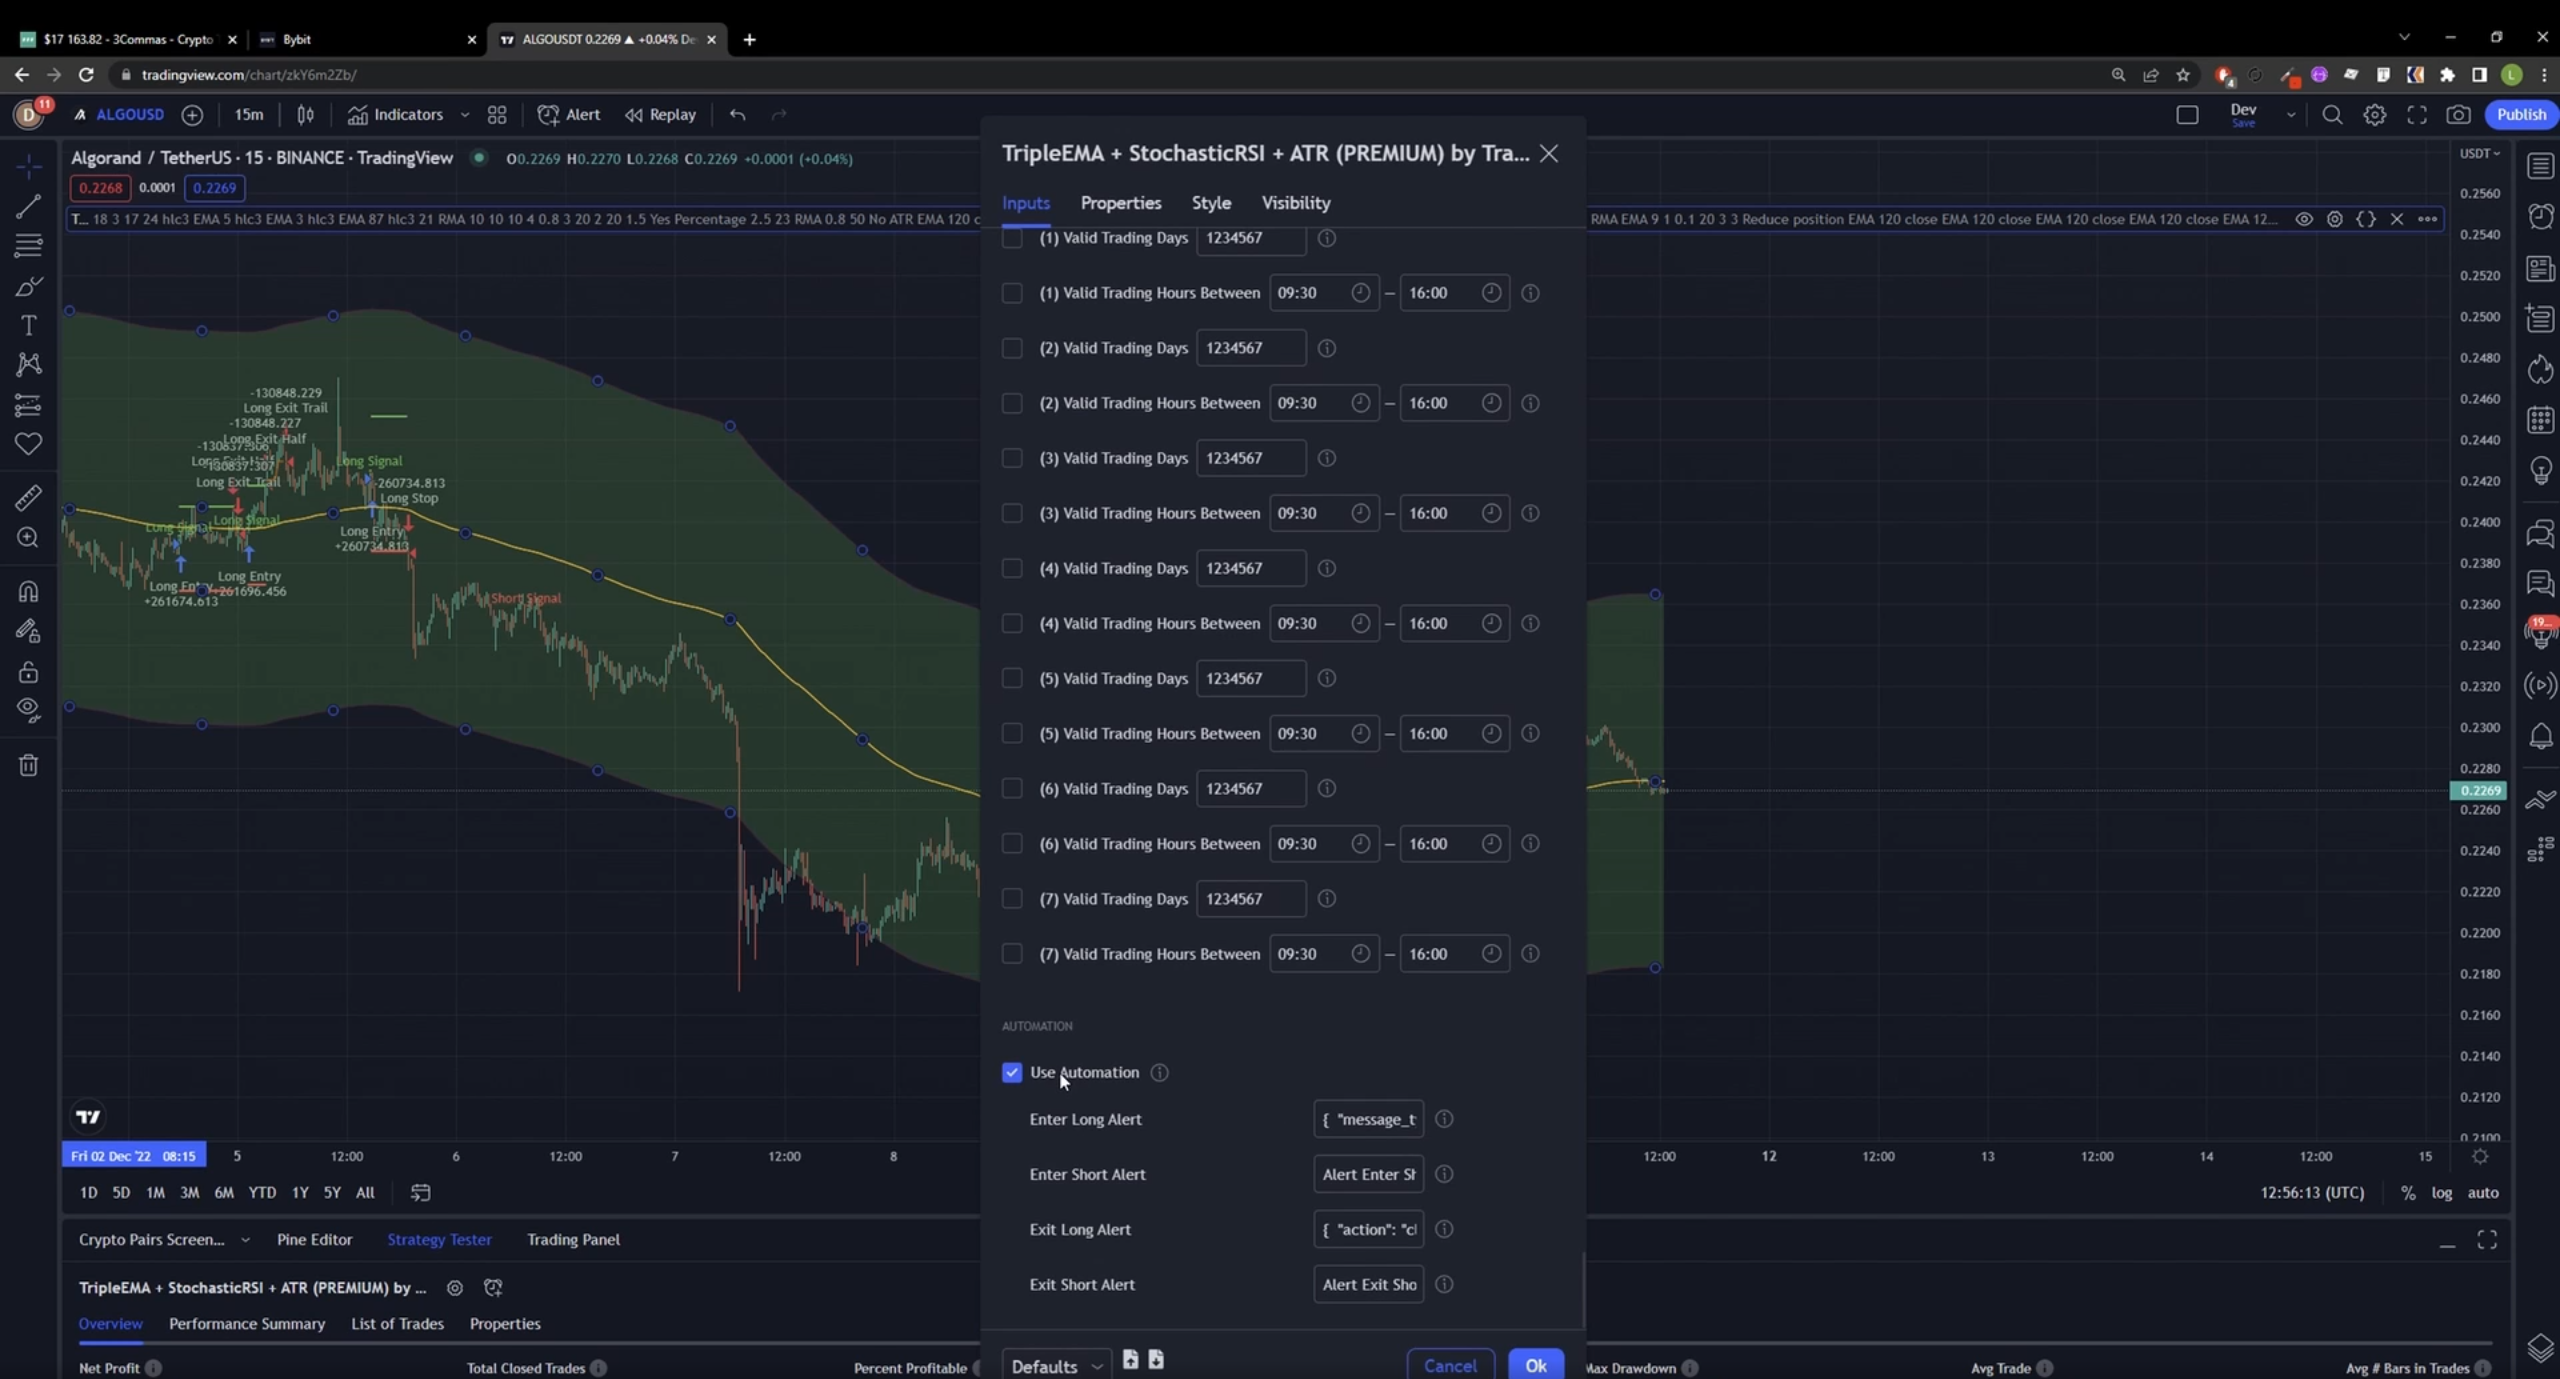
You can see the values that you have to enter here in the WunderTrading tab.
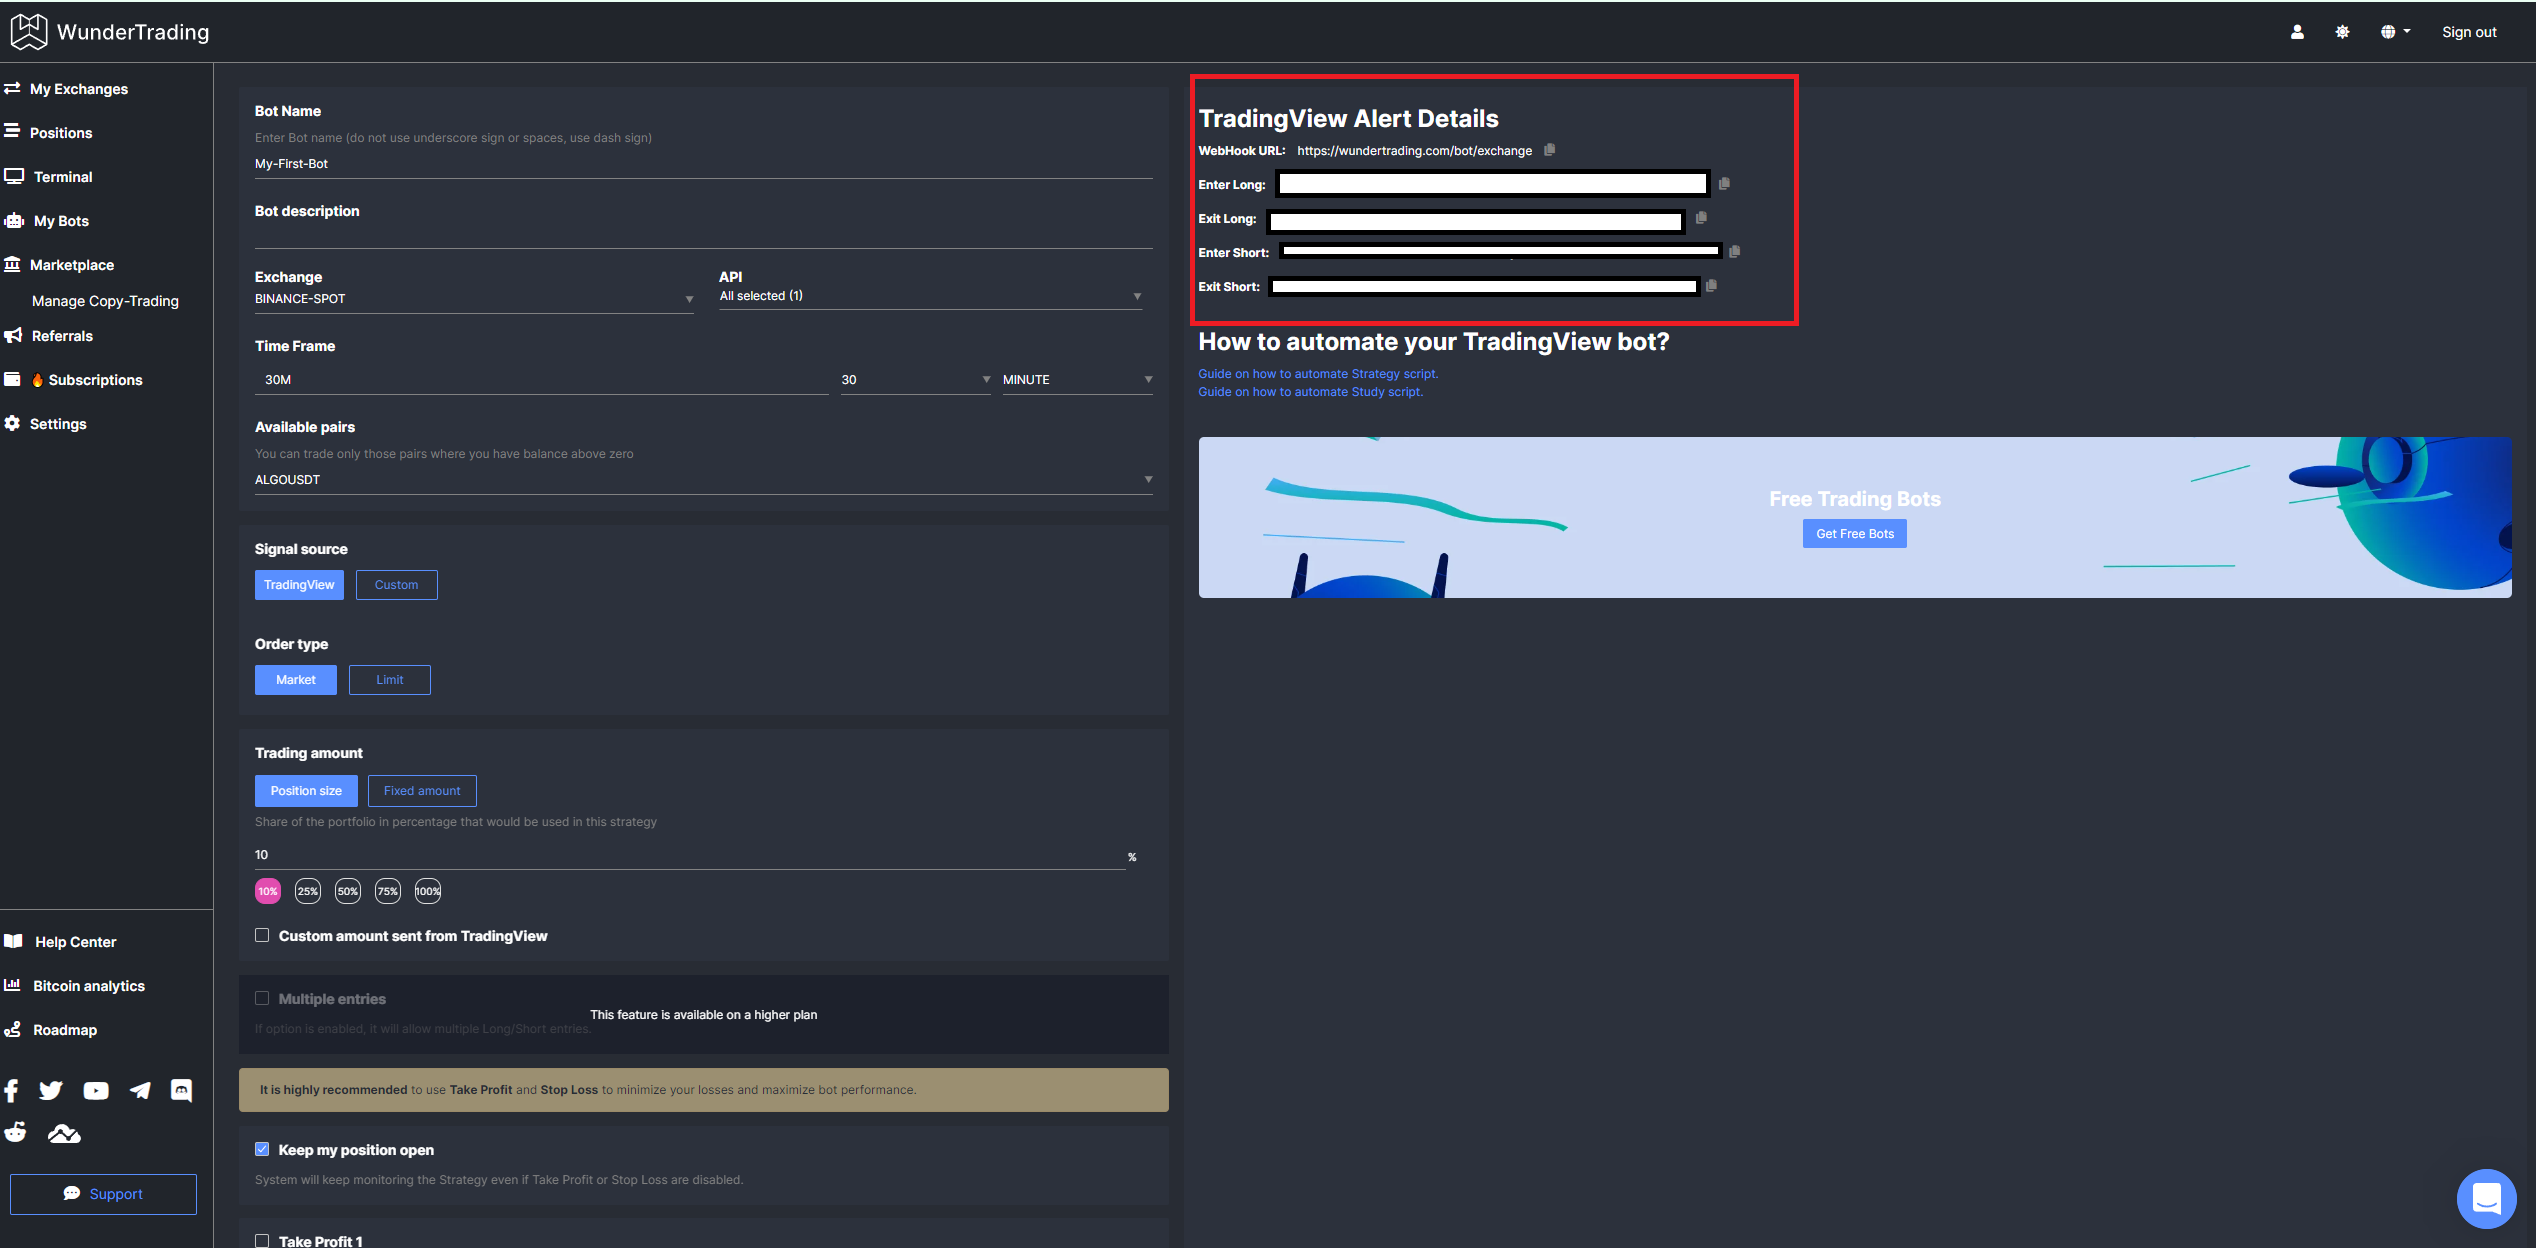
Tip
If you don’t want the script to enter short trades, you can leave that textfield as the default value.
Click “OK” to finalize the settings.
Step 9
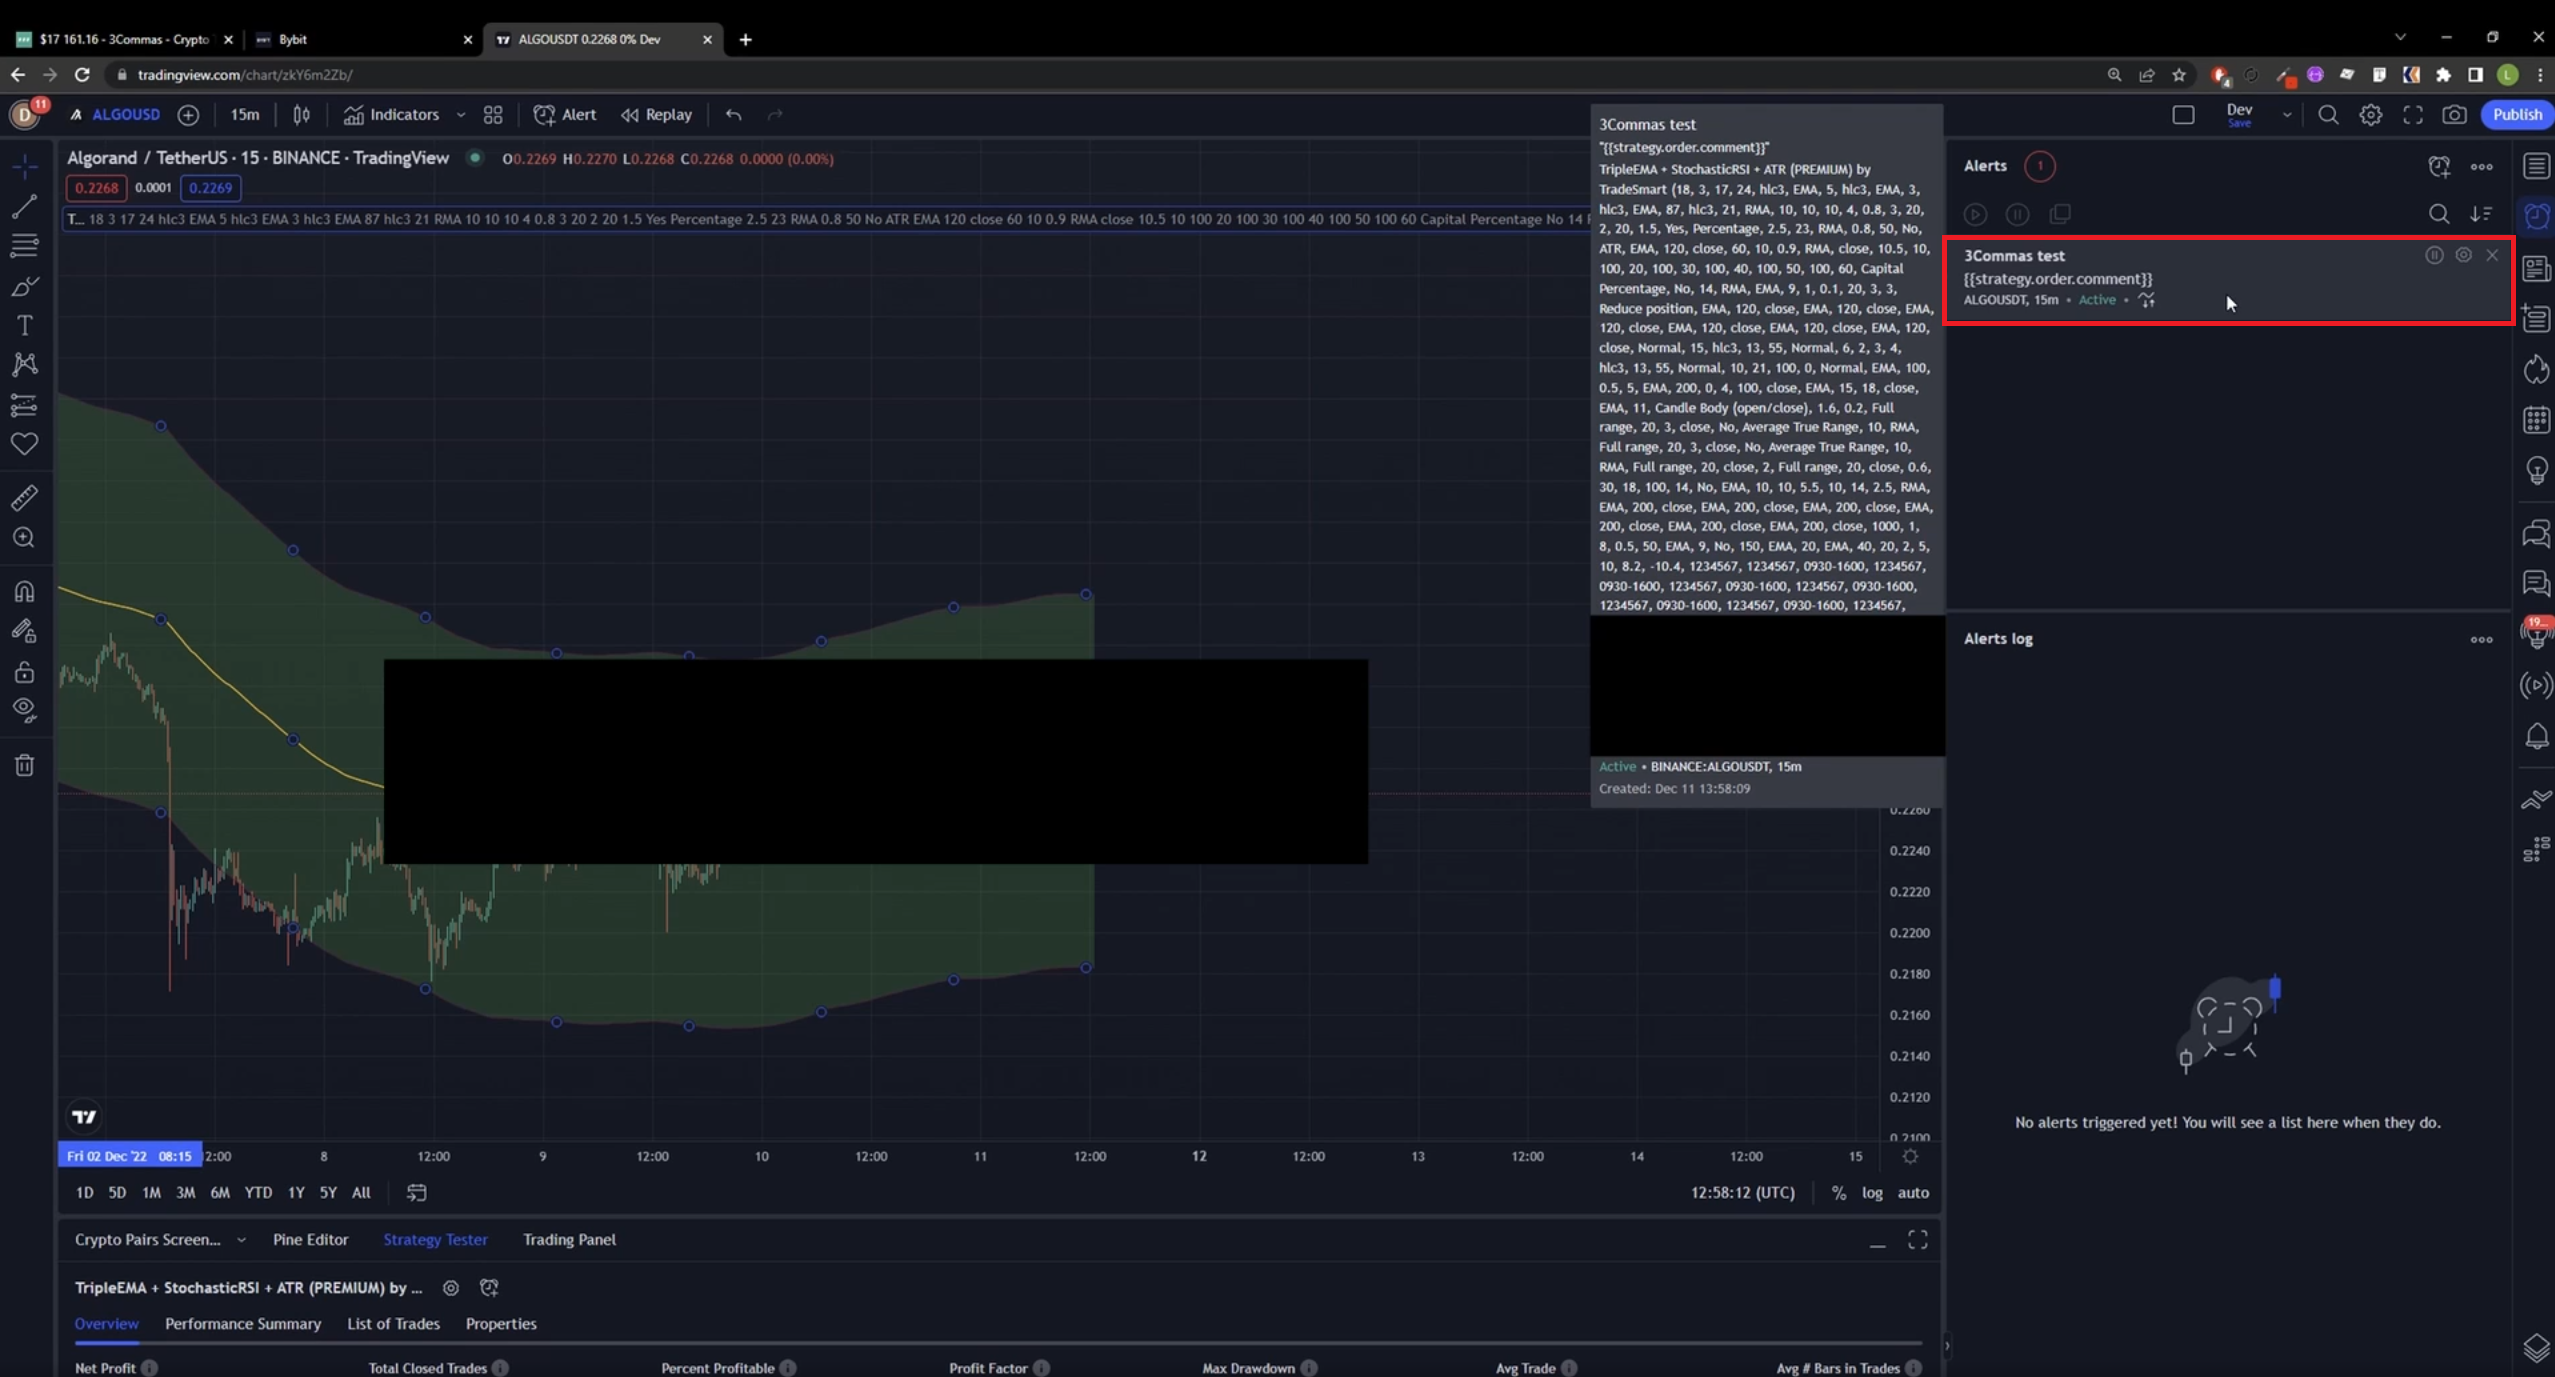
Click on the “Alerts” tab in the top right corner.
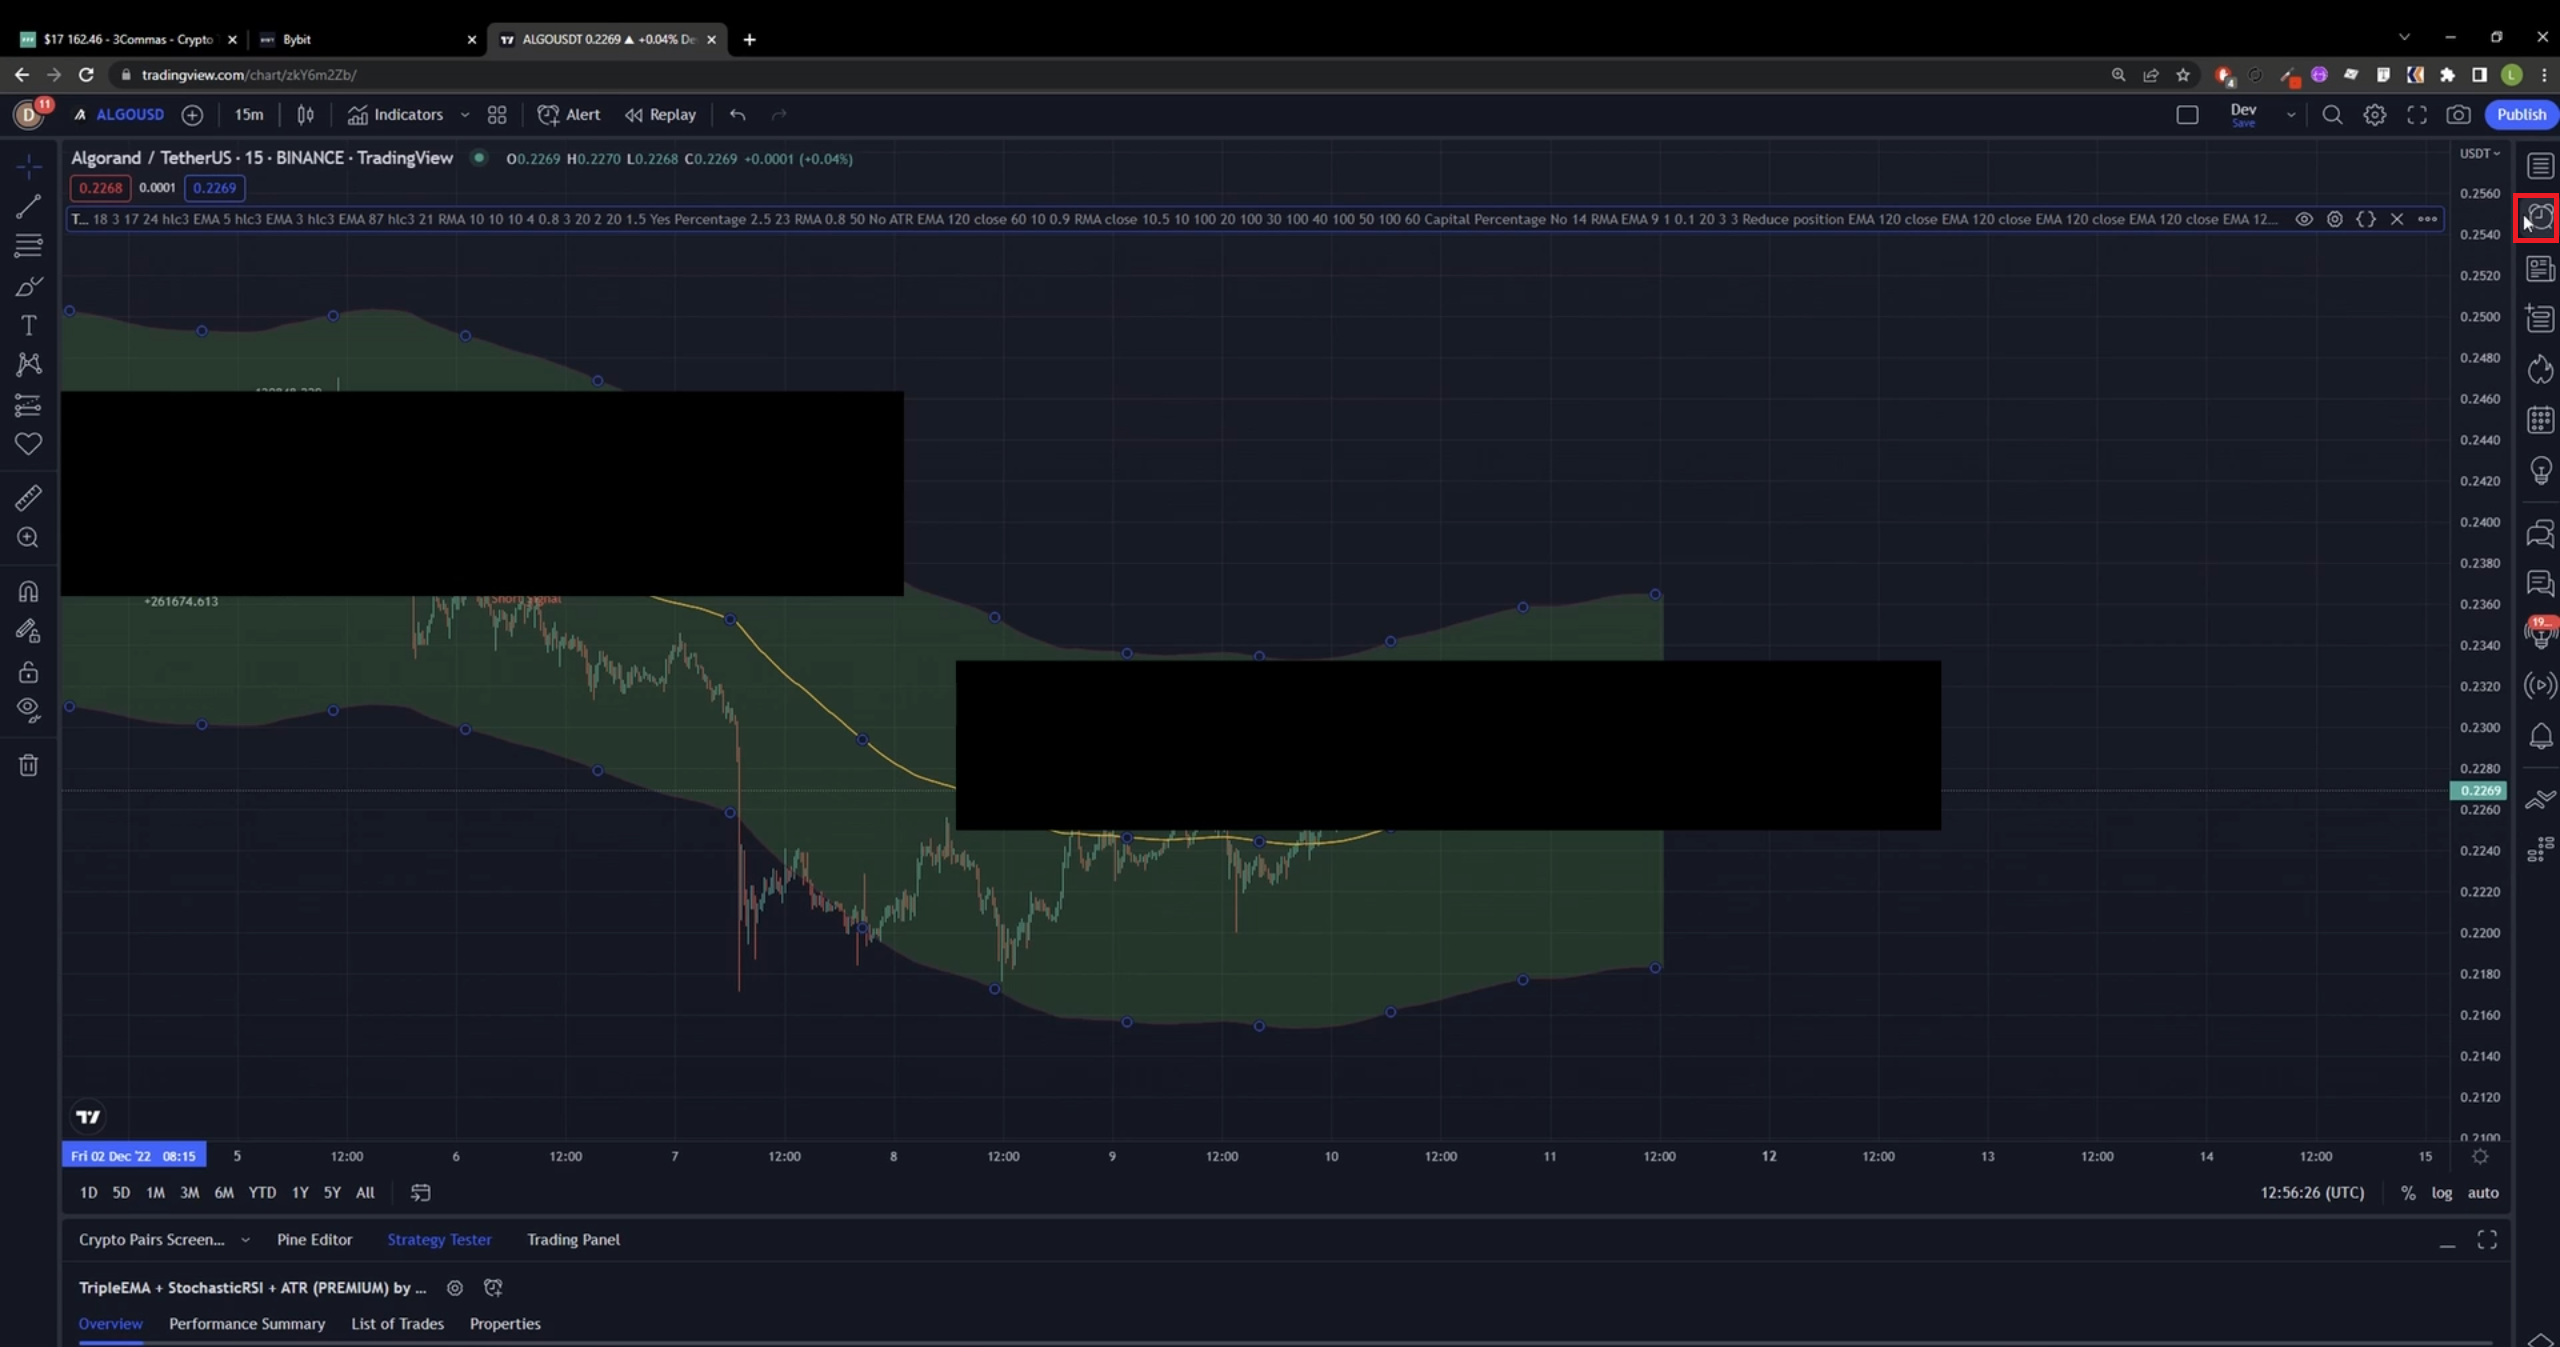
Click on the “Alerts Plus” button.
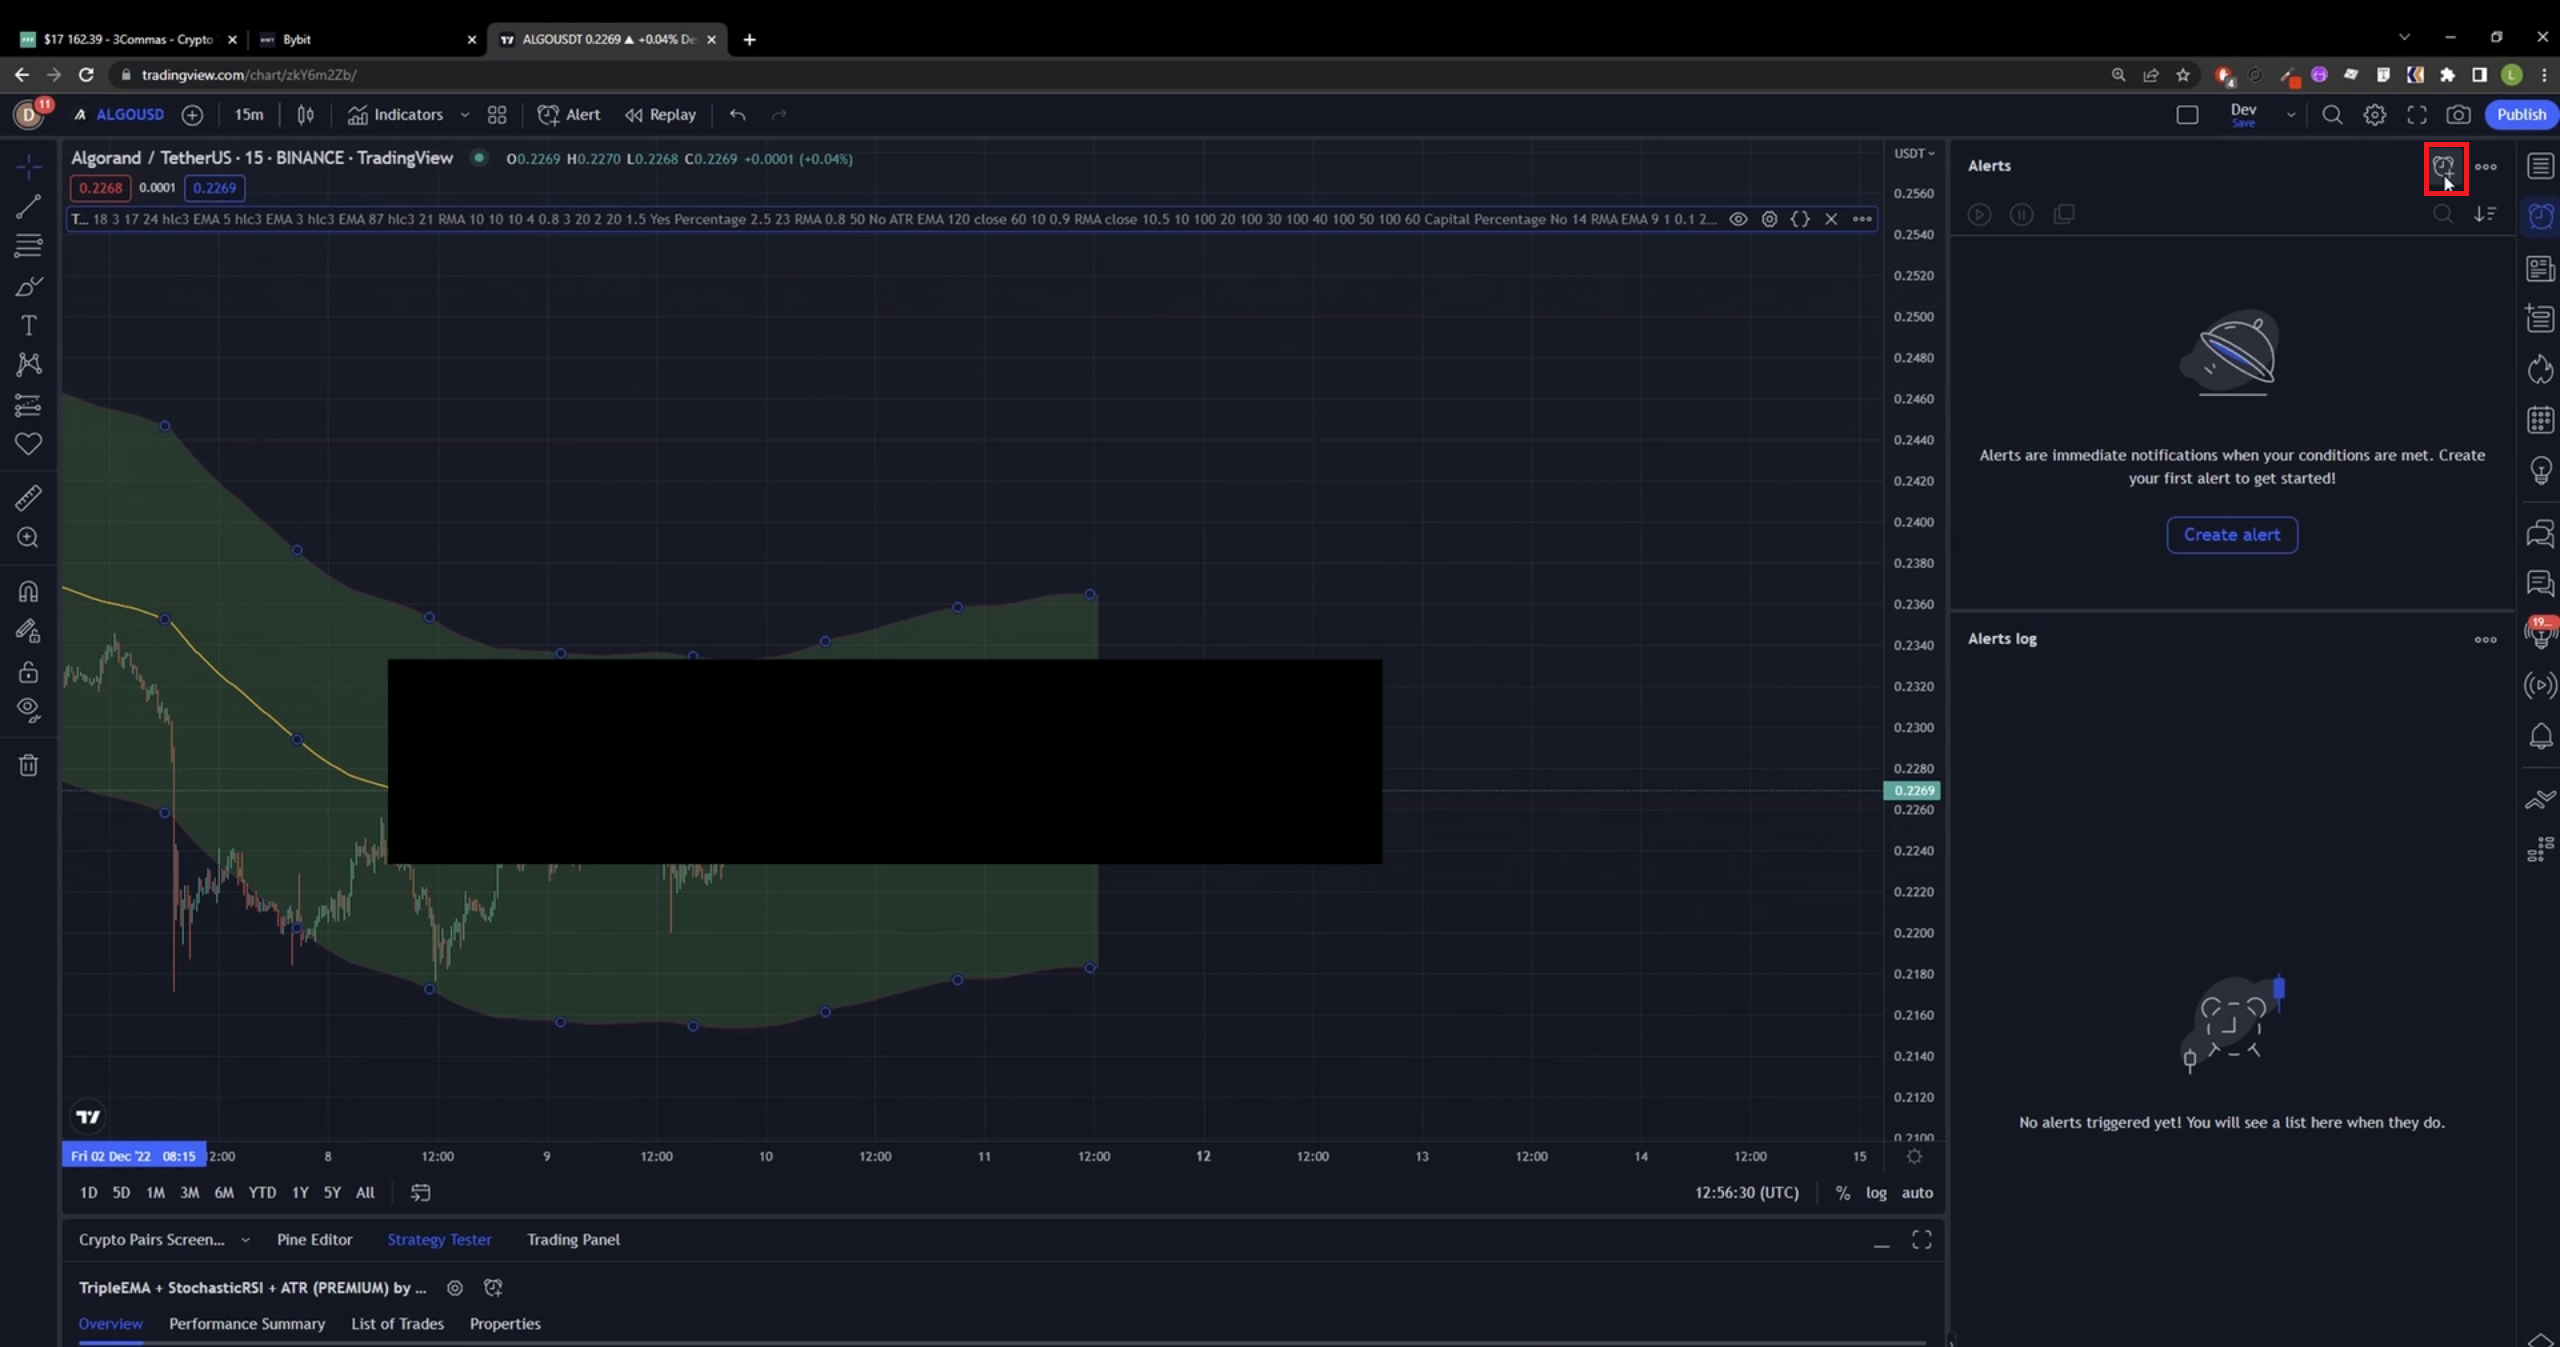
The conditions should be set to your chosen strategy (in this case, it is our Triple EMA strategy).
Set an expiration date for how long you want to use the strategy.
Allow “Show Pop-up”.
Allow Webhook URL, to the textbox, insert the following URL:
https://wundertrading.com/bot/exchange
Tip
Note that with Tradingview’s free version, you can’t allow webhook URLs.
For the message part, add the following line:
{{strategy.order.comment}}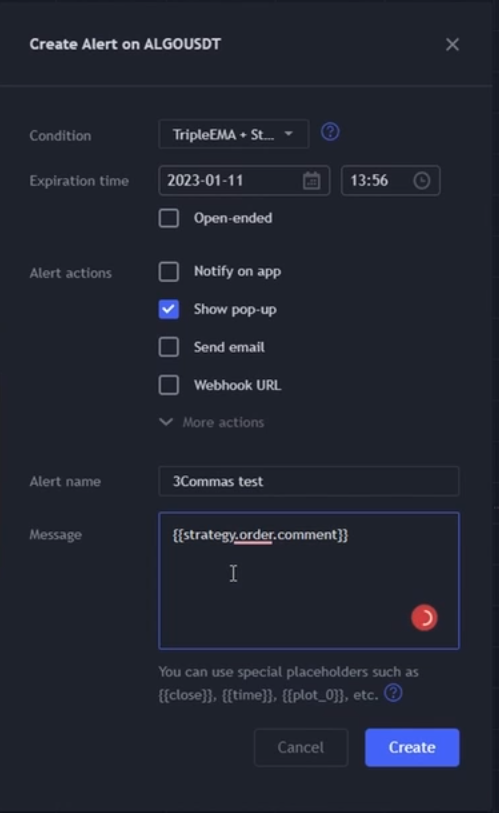
Click “Create” button, and after a few seconds, you should see the alert created.
Step 10
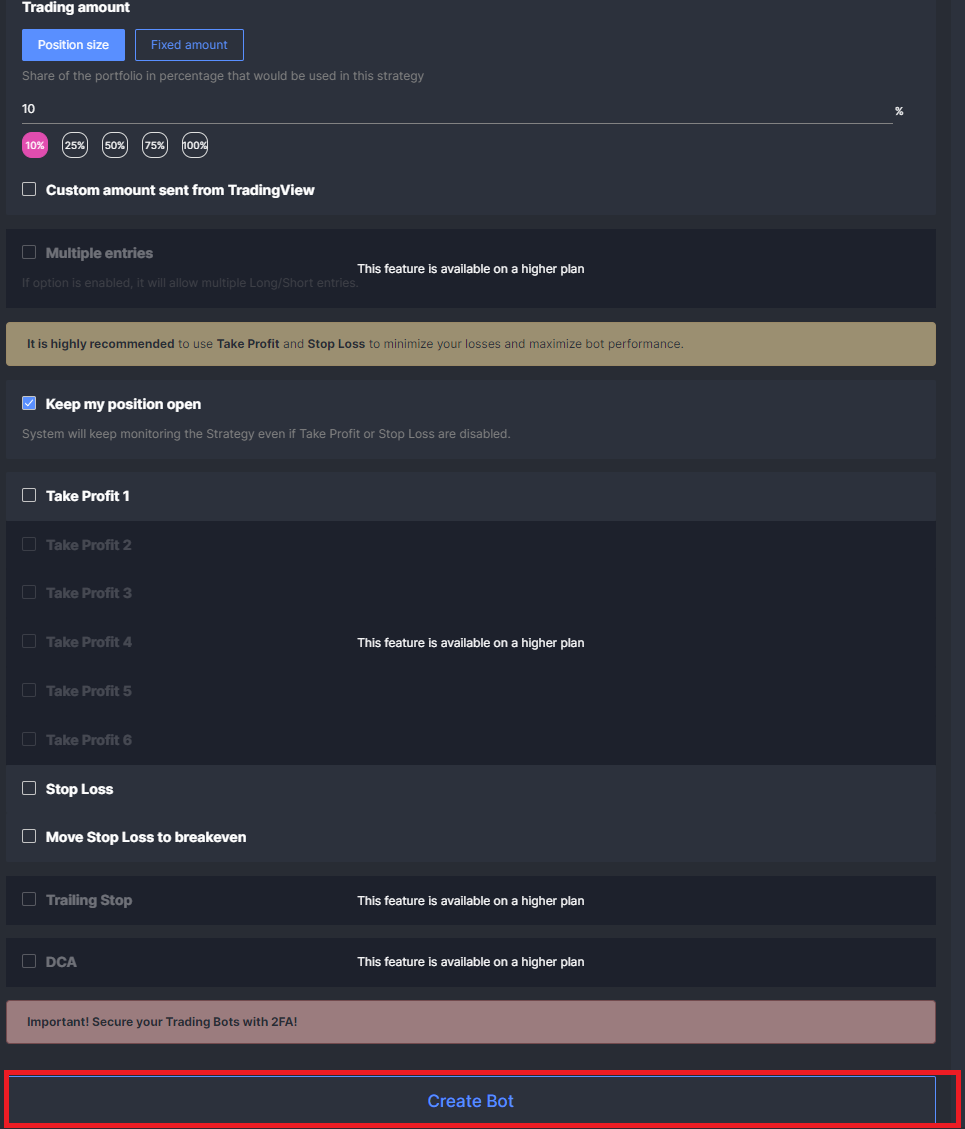
The last step is to go back to WunderTrading and click the “Create Bot” button.
Congratulations! You now have a running script.